
Your home is likely hemorrhaging money. Data from the Department of Energy indicates that the average US household loses 20% to 30% of its energy through invisible gaps, outdated systems, and poor insulation. With utility rates surging across the country in 2026, performing a DIY home energy audit is no longer just an environmental concern—it is a direct hit to your monthly budget.
You don’t need to hire a professional auditor with a $500 infrared camera to find the culprits. By following this systematic DIY home energy audit, you can identify the primary sources of waste and take immediate action to “Slash The Grid.”
As we discussed in our previous guide about overcharging power bills, understanding your baseline usage is the essential first step toward total efficiency.
Phase 1 of Your DIY Home Energy Audit: Hunting for Air Leaks
In the energy efficiency world, your home’s “envelope” is the barrier between your conditioned air and the outside world. If that envelope is compromised, your HVAC system is essentially trying to air condition the entire neighborhood. This is why air sealing is a top priority in any DIY home energy audit.
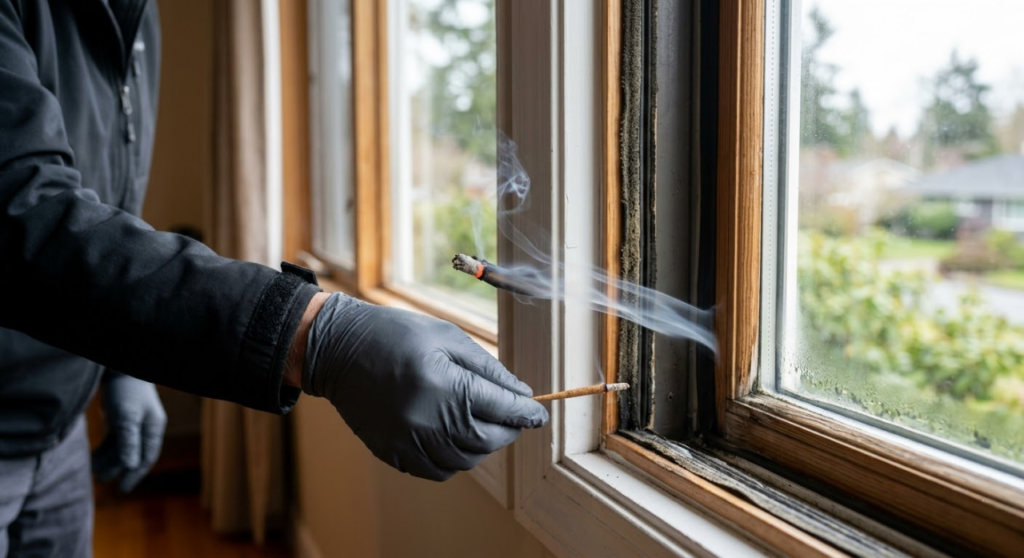
The Incense/Smoke Test: On a windy day, or with your whole-house fan turned on, light a stick of incense or a thin piece of damp thread. Slowly pass it around common leak points. If the smoke wavers or is sucked outward, you’ve found a leak. Focus your search on:
- Windows and Doors: Check the weatherstripping. If you can see daylight through the door frame, you are losing money.
- Electrical Outlets: Most people overlook these. Outlets on exterior walls often leak air through the wall cavity.
- Baseboards and Sill Plates: Check where the floor meets the wall. Gaps here indicate air infiltrating from the crawlspace or basement.
- Plumbing Penetrations: Look under sinks where pipes enter the wall. These gaps are often left unsealed by contractors.
Phase 2: The HVAC Efficiency Check
Your HVAC system is the single largest energy consumer in your home, often accounting for 45% to 50% of your total bill. If it’s not running at peak efficiency, you’re paying a premium for mediocre comfort.
Air Filter Discipline and Audit
A clogged filter forces your blower motor to work twice as hard to move air. Check your filters during your DIY home energy audit. If they are gray and coated in dust, replace them immediately. High-efficiency MERV 11 or 13 filters are great for air quality, but ensure your system’s static pressure can handle them; otherwise, a standard MERV 8 changed monthly is often the more “frugal-smart” choice.
Duct Sealing and Inspection
If you have forced-air heating or cooling, check the exposed ductwork in your attic or basement. Look for “duck tape” (the silver cloth tape), which ironically fails quickly on ducts. Slash The Grid Pro Tip: Use mastic sealant or UL-rated foil tape to seal joints. Leaky ducts can reduce system efficiency by as much as 20%.
Conducting a DIY Home Energy Audit for Lighting and Appliances
Lighting is the “low-hanging fruit” of energy efficiency. The ROI on switching to LEDs is now measured in months, not years. As part of your DIY home energy audit, walk through every room and count your non-LED bulbs.
- The LED Swap: Replace every high-use bulb with a 2026-rated LED. Incandescents release 90% of their energy as heat.
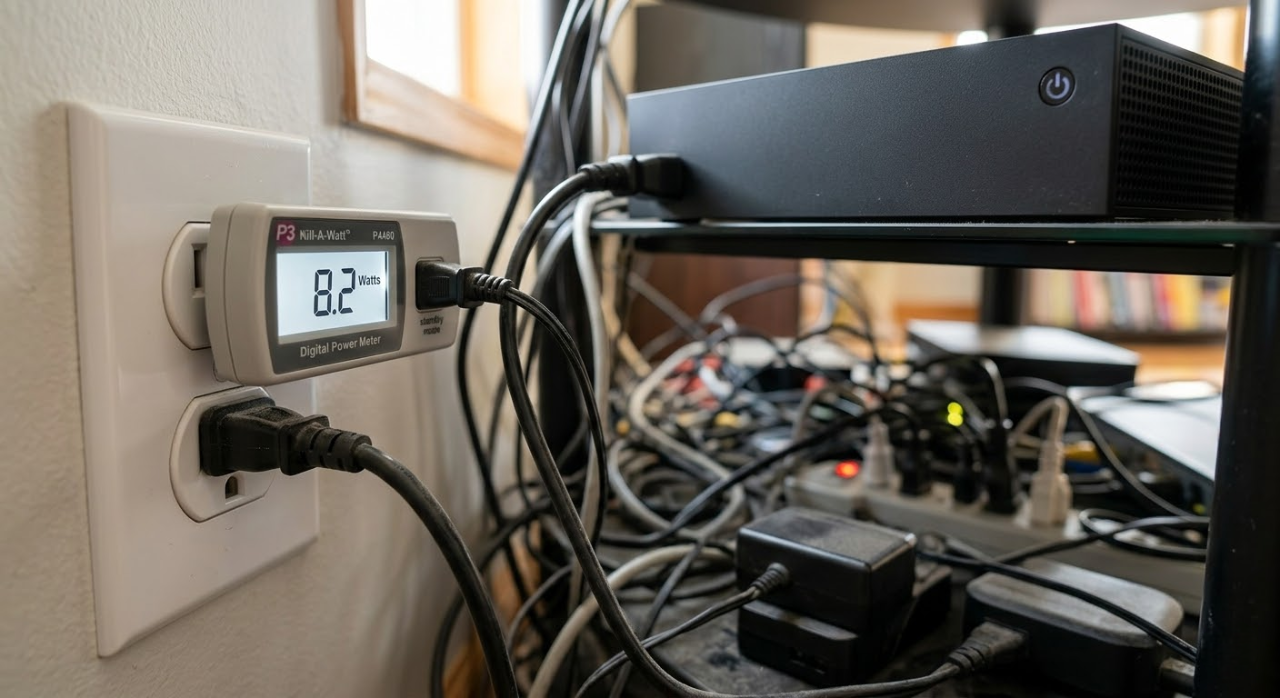
- Phantom Loads (Vampire Power): Use a simple watt-meter (like a Kill-A-Watt) to identify devices that draw more than 1-2 watts while idle.
- Water Heater Temperature: Dialing your heater back to 120°F is usually sufficient and can save up to 22% annually.

Insulation Inspection for Your DIY Home Energy Audit
You don’t need to be a structural engineer to check your insulation; you just need a yardstick. Head into the attic and measure the depth of your insulation as a key part of your DIY home energy audit.
- Fiberglass Batts: Provides roughly R-3.0 per inch.
- Blown-in Cellulose: Provides roughly R-3.5 per inch.
In most US climates, you want an attic R-value between R-38 and R-60. If you can see the wooden floor joists in your attic, you definitely need more insulation to stop the energy bleed.
Essential Tools for Your DIY Home Energy Audit Checklist
You can conduct a high-impact DIY home energy audit with less than $100 in specialized tools. These are the essentials every “Slash The Grid” homeowner should own:
| Tool | Purpose | Approx. Cost |
|---|---|---|
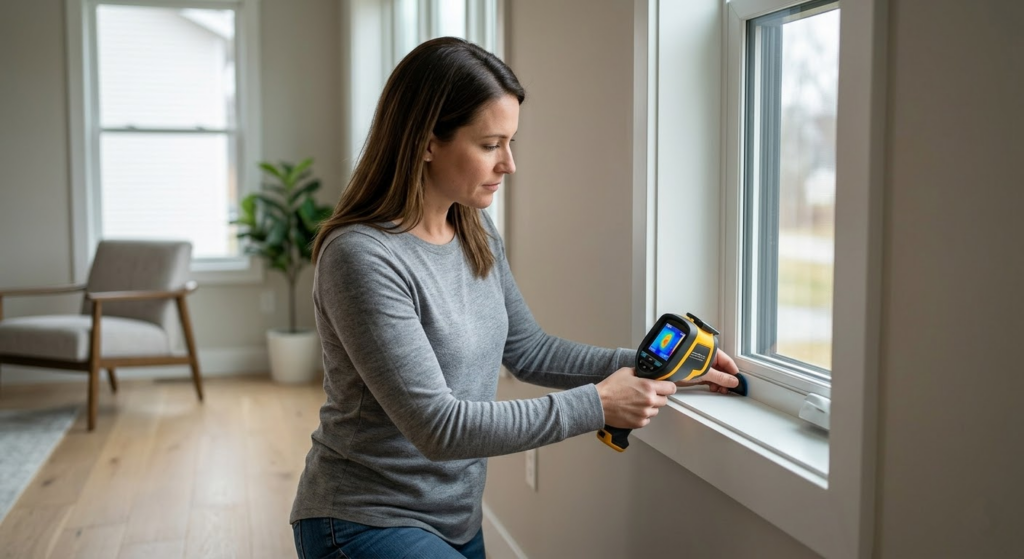
| Thermal Leak Detector | Identifies cold/hot spots in walls and windows. | $30 – $50 |
| Incense Sticks | Visualizing air drafts and envelope leaks. | $5 |
| Caulk Gun & Silicone | Sealing permanent gaps around windows and plumbing. | $15 |
| Weatherstripping | Replacing worn seals on doors and moving windows. | $10/roll |
| Smart Plugs | Automating “off” times for phantom load electronics. | $10 – $20 |
STG Pro Tip: The Seasonal Pivot
In the US, your DIY home energy audit should change with the solstices. Winterizing means focusing on sealing cold air entry points, while Summer Prep means ensuring attic ventilation is clear to prevent heat radiation.
Conclusion: Start Your DIY Home Energy Audit Today
Perform this DIY home energy audit today. Once you have your list of “leaks,” prioritize them by cost-to-fix versus potential savings. Start with the air leaks and the thermostat—these are the quickest wins for your wallet.
Don’t let another month of ‘phantom loads’ drain your bank account. Take 20 minutes to run this audit and share your results in the comments. If you hit a snag, let us know—the Slash The Grid community is here to help you understand your bill and your home!”